Stand alone "room in a room" studio build in Orange NSW Australia

Document your build here: All about your walls, ceilings, doors, windows, HVAC, and (gasp!) floated floors...
gearjunk1e
Full Member
Posts: 104
Joined: Sun, 2021-Mar-07, 19:19
Location: Orange Australia

Stand alone "room in a room" studio build in Orange NSW Australia

#1

Postby gearjunk1e » Tue, 2021-Jun-01, 06:31

Hi everyone

Documenting my build as I go
My design post is on
https://www.digistar.cl/Forum/viewtopic.php?f=5&t=915

Almost completed the first stage of the build - what is referred to as a "hay shed" - basically a galvanised steel frame with a corodek (galv iron) roof on a concrete slab. Just some work to do to finish the front gutter and barge flashing. I've installed insulation under the roof to address excessive noise from rainfall and condensation issues - just need to tape up joins.
20210531_155214.jpg
Anticon
20210601_161404.jpg
Shed frame side
20210601_161504.jpg
Shed front
Dug the trench for the electrical and ethernet cables; had to dig by hand given I was trying to dodge water pipe and sewer pipes and didn't have a plan for exactly where they'd been laid. All pipes found with no incidents :D
20210601_161330.jpg
trench
Next step is doing the damp proofing and flashing that will sit under the treated pine frames that will hold both the external skin (corodek) on the outside of that frame and the walls of the outer room - on the inside of that frame. We sit on top of the ridge here and the rain can come in sideways from any direction so I'm taking a dual approach to waterproofing the base - DPC selected is bitumen coated aluminium that can be folded to shape
image.png
sill plate and sills


Andrew


User avatar
gullfo
Senior Member
Posts: 650
Joined: Fri, 2021-Jun-25, 14:50
Location: Panama City Beach, FL USA

Stand alone "room in a room" studio build in Orange NSW Australia

#2

Postby gullfo » Mon, 2021-Jul-19, 14:20

looking good!


Dr Space
Full Member
Posts: 162
Joined: Wed, 2019-Sep-25, 05:47
Location: Portugal
Contact:

Stand alone "room in a room" studio build in Orange NSW Australia

#3

Postby Dr Space » Tue, 2021-Jul-20, 08:26

So far so good.. Exciting... 8-)


gearjunk1e
Full Member
Posts: 104
Joined: Sun, 2021-Mar-07, 19:19
Location: Orange Australia

Stand alone "room in a room" studio build in Orange NSW Australia

#4

Postby gearjunk1e » Fri, 2021-Jul-23, 01:40

gullfo wrote:Source of the post looking good!
Glenn - I'm close to posting again in the design board re HVAC design - the ceiling design forced me to face into this and the weather here has given me a lot more research time - both :D and :(
Dr Space wrote:Source of the post So far so good.. Exciting... 8-)
Dr Space - thanks for looking in - it led me to your build posts - wow!!!...and I thought I had a tough time getting approvals and trades in :D
Andrew


gearjunk1e
Full Member
Posts: 104
Joined: Sun, 2021-Mar-07, 19:19
Location: Orange Australia

Stand alone "room in a room" studio build in Orange NSW Australia

#5

Postby gearjunk1e » Sat, 2021-Oct-16, 00:38

Bit of an update - I don't want to bore people with basic shed building updates so I've tried to keep pics to matters that have some impact on isolation.

Its been slow going - the rainfall has been frequent and above average this winter. That however, has been an ever present reminder that my damp course solution is VERY important - especially since we sit on a ridge line and the wind can be brutal - bringing rain in almost sideways at times and I DON'T want water seeping in between my rooms where I'll never see it until its too late!

So I've spend a truckload of time getting my waterproofing right at the base. It starts with a layer of bitumen coated aluminium on the slab edge held in place by some treated pine (base plate 1) with a metal sill on top. The base plate of the framing will sit on this.
20210721_171427.jpg
Profile shot of damp course system - you can almost see the bottom plate which is clearer in other shots
20210713_122442.jpg
I also sealed the join of the slab and the inside turn up of the bitumen coated aluminium with some SIKA FC11+ sealant. (photo bomb!)
20210713_144253.jpg
The concrete frog who's lost his head is doing its job in this shot
20210713_144301.jpg
Below is a mock up of how the metal sheeting with sit over the sill - before I made up the sills that sit in front of the columns and the next pic, a shot of one of the detailed cut outs around the columns
20210707_165646.JPG
20210901_155048.jpg
Headless concrete frog doing stuff all!
20210901_122314.jpg
I went a bit overboard with the sealant...anything that moved
Very pleased that my brother-in-law (builder) re-arranged his round the country road tour and turned up to accelerate the framing work - two are sooo much better than one!
Here's some framing shots and the start of hanging the wall wrap...Ametalin VapourTech Brane VHP Vapour Permeable Wall Insulation - its there in part to give me some rain protection pending cladding but most importantly to provide some insurance against condensation - it lets moisture out but not in. I can vouch for it not letting water in over the past week - we've had rain and wind coming in from all sides. Per feedback from Stuart, I'm putting some low GFR insulation on the inside of it to dampen any potential vibration in the cladding.
20211008_175543.jpg
20211009_135345.jpg
20211009_135319.jpg
20211009_135310.jpg
and with the wall wrap on all unprotected sides
20211009_190122.jpg
20211009_190158.jpg
20211009_190211.jpg
20211013_102935.jpg
One day it might stop raining again so I can get some cladding on and start actually building the studio :D
Andrew


Dr Space
Full Member
Posts: 162
Joined: Wed, 2019-Sep-25, 05:47
Location: Portugal
Contact:

Stand alone "room in a room" studio build in Orange NSW Australia

#6

Postby Dr Space » Sat, 2021-Oct-16, 06:54

Looks great Andrew... Some things can be really difficult in Portugal... at the moment as fall and winter get going I still can't manage to get my windows put in.. Ordered in April and the frames are made but no glass has been delivered even though both companies said they would be ready in September.. Crazy sometimes but we will get there... both of us!!


gearjunk1e
Full Member
Posts: 104
Joined: Sun, 2021-Mar-07, 19:19
Location: Orange Australia

Stand alone "room in a room" studio build in Orange NSW Australia

#7

Postby gearjunk1e » Thu, 2021-Oct-21, 06:41

Dr Space
Yes - we have had quite a lot of COVID impact on supply of goods here - in our case due to lockdowns mostly which has meant production is down...trying to get LVL, framing timber or insulation is hard work...so I feel your pain.
Andrew


gearjunk1e
Full Member
Posts: 104
Joined: Sun, 2021-Mar-07, 19:19
Location: Orange Australia

Stand alone "room in a room" studio build in Orange NSW Australia

#8

Postby gearjunk1e » Fri, 2022-Aug-05, 08:12

Wow

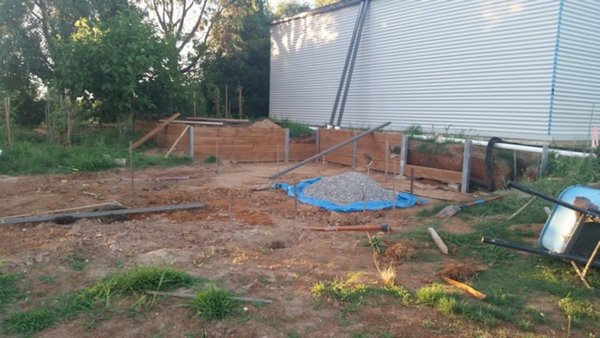
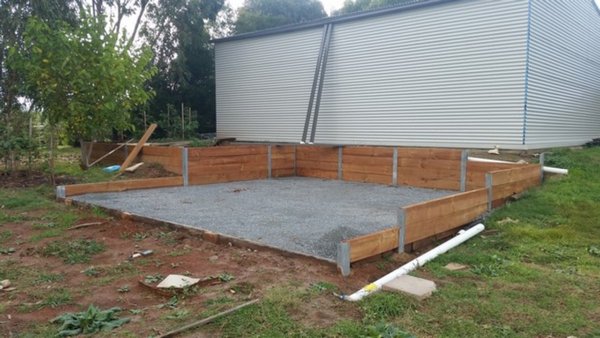
I can’t believe how long it’s been since I last posted – much has happened since but most of that is to do with the external skin of the shed and steps to gain Council approval, rather than any studio building per se. I ended up excavating an area behind the shed and building a retaining wall so that I could install a 2nd water tank that will take the stormwater off my new structure. That’s occupied the better part of 6 months of building time. :blah: While this has nothing to do with isolation or acoustics - no Council approval means there is NO STUDIO. Anyway, Council have signed off on the key structural issues this week and I’m now free to get on with the fun stuff.
Here are some shots of the external work since I’ve invested so much time in it.
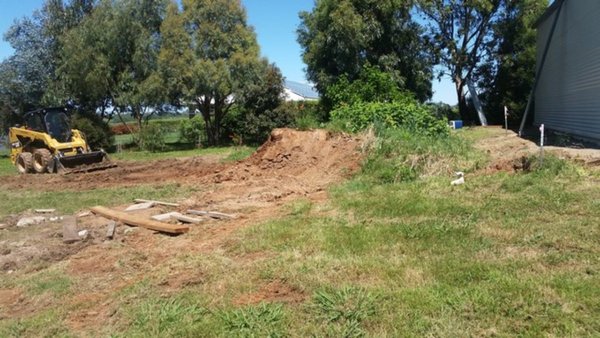
Pre excavation.jpg
tank site before work
Retaining wall build.jpg
building the retaining wall
Tank site ready.jpg
site ready
Front.jpg
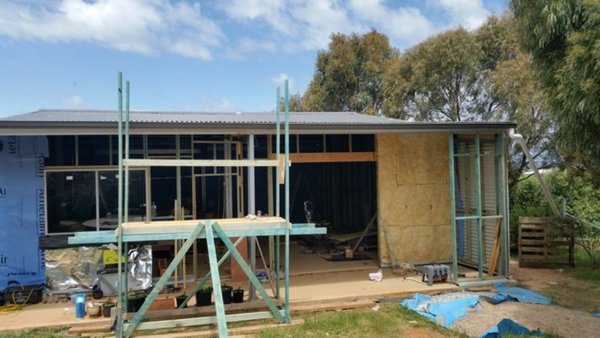
My brother in law helped with the cladding - he built a couple of temporary platforms that we shifted around to lift and fix the material to the frame
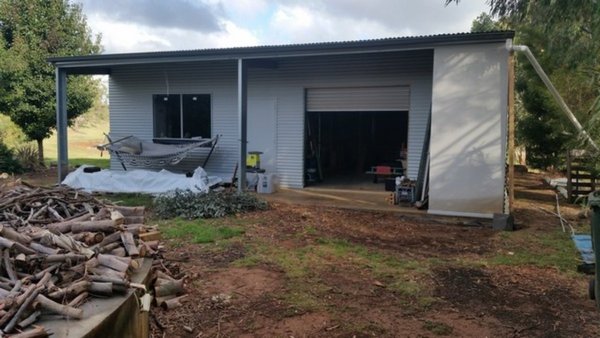
Front right.jpg
lock up!
east wall.jpg
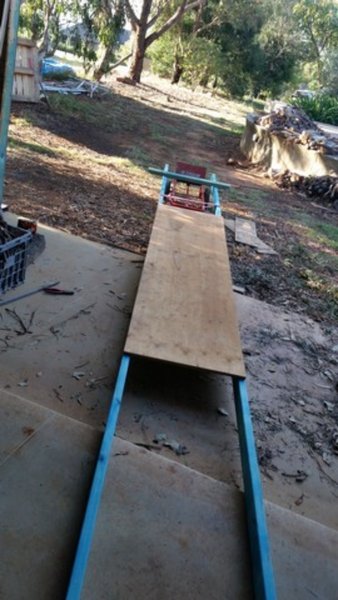
Fyrchek trolley.jpg
made this up to shift the piles of fyrchek (drywall) round to the shed
Rear view rear tank.jpg
Side pipe run.jpg
Run to 2nd tank.jpg
Rear pipe run 2nd tank.jpg
overflow to north.jpg
In between cladding, trenching, excavating, levelling and hanging and laying gutters/stormwater pipes, I have been busy on the prep work to allow me to complete the construction of what will form the outer room walls. Most of that is bridging the gap between the loose tolerances of the steel framed structure and those required to get a consistent isolation outcome to the target level – for example, packing out the frame so the outer leaf of the studio will sit flat, laying the base plates and setting up the metal frame to hold my C section steel joists.

By way of reminder,

• I am building a live room 4.77m x 6.93m x 3.1m and a control room 5.2m x 4.2m x 3.1m within an outer shell that covers 70% of the overall shed area
• I’m aiming for 60dB TL at 1m – but can accept 50dB;
• For the outer shell I am using 1 layer of part 16mm ply/part 16mm Frychek (drywall) then one layer of Frychek (drywall) for the outer leaf - with green glue between the leaves;
• There is then an air gap of 200mm filled with fluffy; and
• 2 layers of 16mm Frychek (drywall) with green glue between for the inner room walls

I was toying with a ducted mini-split but have since decided to go with 2 ductless mini- splits. I will post my HVAC and insulation plan on my design thread.

Per post 33 in my design thread - with some good advice - I’ve established that while the metal cladding on the very outside has the potential to be a third leaf, the risk is very low and I have mitigated that risk by putting fluffy in the wood frame that holds the metal cladding.

Pics below of some of the internal work that I have progressed.
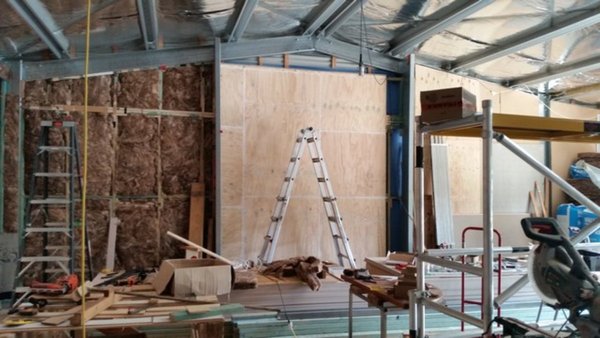
West side ply.jpg
My outer wall is part drywall/part ply as I had to have ply shear bracing at intervals around the perimeter - it was convenient to finish this first leaf on this wall section in ply
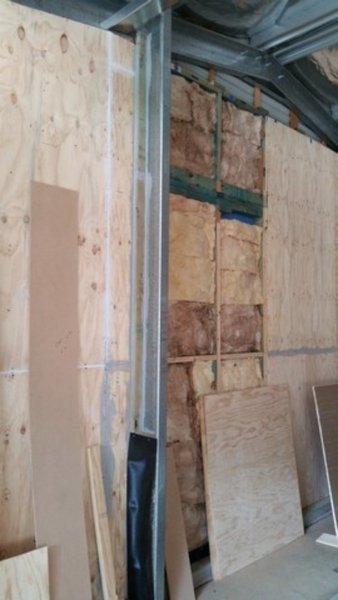
Mullion context.jpg
wide shot of the next pic
Mullion integration.jpg
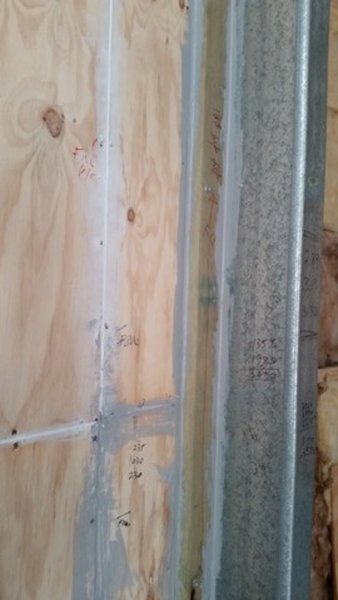
The metal frame mullion columns are part of the outer wall - 2.4mm of steel plus 45mm of timber equates to the rest of my wall mass
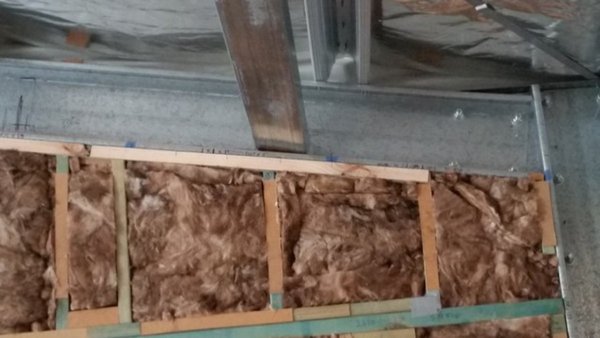
packing for rafters 2.jpg
Couple of shots of the packing that sits in the C section of the frame - the ceiling steel rafters will sit on this - they are temporarily on their sides
packing for rafters 3.jpg
packing for rafters.jpg

Next steps
My workflow for the next few weeks will be centred on getting enough floor space back so I can utilise my drywall lift to hang the outer ceiling. At the moment I have piles of fyrchek (drywall) covering almost ½ the floor area. I have a plan for the walls and ceiling construction that will minimise the moving around of materials while leaving me adequate workspace to manage hanging 3.0m and 3.6m lengths of 16mm material. To do this I need to finish up the packing in the middle metal frame to hold the metal C- section steel rafters that the 2 layers of 16mm Fyrchek.

I promise to be more diligent with documenting the build diary now the work has turned to studio building :)

But in the meantime will post some more progress pics - hit the limit for this post

Andrew


gearjunk1e
Full Member
Posts: 104
Joined: Sun, 2021-Mar-07, 19:19
Location: Orange Australia

Stand alone "room in a room" studio build in Orange NSW Australia

#9

Postby gearjunk1e » Fri, 2022-Aug-05, 09:37

Extra pics per last post - hope these descriptions make sense
Base plates.jpg
My design post talks about the need to have "inside" base plates - these have multiple tubes of caulk (sealant) underneath and between (per Stuart's instructions)
packing west.jpg
Lots of packing to cater for variations in metal frame and wood framing that had to follow any variations in the metal frame
Packing east.jpg
More packing - fortunately, the back wall was dead straight and perpendicular
packing east 1.jpg
This one shows some of the blocking I needed to do behind/next to the steel columns so that the backer rod has something to push on to and to pack out any variations between the steel columns and frame
Rafters.jpg
Some of the outer wall ceiling rafters are sitting up there - for now so I could get a level between the outside frames and the middle one for the ceiling (to work out packer thickness) - the middle frame actually sits up to 30mm below the outside ones as it moves towards the apex
Rafters.jpg[/attachment]
Central frame.jpg
another angle on the rafters and the middle frame
Lift vertical 2.jpg
I had to include this - I made a frame from one of the drywall pallets - added some casters to the base that allows me to lift the 3.0 and 3.6m 16mm frychek into place by myself - although my wife prefers that I get her to "spot" me
Lift horizontal.jpg
lay it flat, slide them on, lift the frame and wheel them into place - the base of the frame when upright is set to just above the base plates so its an easy slide into place
blocking behind posts.jpg
another variation on the blocking behind/beside columns - not for isolation but gives the backer rod that will go in between the steel column and drywall sheets something to push against


gearjunk1e
Full Member
Posts: 104
Joined: Sun, 2021-Mar-07, 19:19
Location: Orange Australia

Stand alone "room in a room" studio build in Orange NSW Australia

#10

Postby gearjunk1e » Thu, 2022-Oct-13, 08:50

So much for regular posts! :oops:

Plenty happening but much of it not markedly visible other than to those who have been through the painstaking process of ensuring every part of the build hits the continuous mass requirements.

The last two months have been dedicated to:
1. Completing three sides of layer 1 of the outer wall (I’ll frame and clad the 4th side once I’ve got most of the drywall (plasterboard) sheet off the floor to give me some working room)
2. Marking up the screw positions for Layer 2
3. Mounting the 22 C section steel purlins that hold the outer ceiling;
4. Building out the central steel beam to the mass requirements (37.5kg/m2) I need as the two sections of outer ceiling butt up against either side of this beam as it is providing the mass for this part of the ceiling;
5. Bolstering the mass of the C section columns that form part of the outer wall; and
6. Doing some design work around ventilation (silencer sizing, mounting and duct design) that I will post in my design thread

I look forward to getting past working with and around the steel frame – if I ever did this again (and I won’t) I’d use masonry walls for the outer structure and get A frame trusses made to support the roof cladding. Of course the grass is always greener….and part of my complexity resulted from trying to squeeze every ounce of internal space out of the footprint.

Pics below

3 almost completed walls – couple of gaps just hanging out for some offcuts of the right size/orientation
20220818_100637.jpg
20220818_100657.jpg
20220818_100527.jpg
20220807_223535.jpg
20220807_112853.jpg
My able assistant
The outer ceiling purlins in place – just need to fix the over battens to stop any “roll”
20220922_171741.jpg
20220922_171729.jpg
The much “loved” centre beam with all the added extras to get the mass up to the target level and some overhanging pieces to provide a solid surface to push the backer rod into once the ceiling is hung.
20220930_170543.jpg
20221010_100046.jpg
20221010_100105.jpg
20221010_100131.jpg
20221010_100428.jpg
20221010_100457.jpg

This month is all about hanging the ceiling sheets and getting most of layer 2 of the outer wall/ceiling off the floor and hung!

Andrew


User avatar
endorka
Senior Member
Posts: 679
Joined: Mon, 2019-Sep-23, 06:36
Location: Scotland
Contact:

Stand alone "room in a room" studio build in Orange NSW Australia

#11

Postby endorka » Fri, 2022-Oct-14, 02:30

Good stuff. Will you be making use of the extra space offered by the peaked roof when building the inner room?

Cheers,
Jennifer


gearjunk1e
Full Member
Posts: 104
Joined: Sun, 2021-Mar-07, 19:19
Location: Orange Australia

Stand alone "room in a room" studio build in Orange NSW Australia

#12

Postby gearjunk1e » Fri, 2022-Oct-14, 08:56

endorka wrote:Good stuff. Will you be making use of the extra space offered by the peaked roof when building the inner room?

Cheers,
Jennifer


Jennifer
Thanks for your support...this stuff gets hard sometimes - takes forever :( . So any little bit of encouragement is welcomed.
On the "peaked" roof - yep inside rooms follow the same line - just 200mm lower. In my live room I get to a peak acoustic height of 3.2m on the flat bit and about 3.0 and 2.9m at the very ends of the rakes.
Andrew


User avatar
endorka
Senior Member
Posts: 679
Joined: Mon, 2019-Sep-23, 06:36
Location: Scotland
Contact:

Stand alone "room in a room" studio build in Orange NSW Australia

#13

Postby endorka » Fri, 2022-Oct-14, 21:29

gearjunk1e wrote:Source of the post On the "peaked" roof - yep inside rooms follow the same line - just 200mm lower. In my live room I get to a peak acoustic height of 3.2m on the flat bit and about 3.0 and 2.9m at the very ends of the rakes.
Andrew


Excellent, that has great potential. Cheers! Jennifer


gearjunk1e
Full Member
Posts: 104
Joined: Sun, 2021-Mar-07, 19:19
Location: Orange Australia

Stand alone "room in a room" studio build in Orange NSW Australia

#14

Postby gearjunk1e » Fri, 2022-Dec-02, 22:26

Work progresses - slowly the outer layer is being built out. Spring here means lots of garden/yard time - especially this year with record rainfall so my studio construction hours are down :(

The reason for an "outer wall mid build post" is that I celebrated a joyous event last weekend - I actually now have a clear floor on one side of the studio area :D :D
20221128_190100.jpg
20221128_190003.jpg
It has come at just about the right time - I've been getting very frustrated working around piles of gyprock (drywall). I've developed a number of "weapons" to enable the lifting and placement of 16mm sheets on the walls and ceilings so that I can get by generally with a little help from my wife and only then because of the risk of breaking long sheets rather than anything else. The powered hoist I bought for lifting stuff into my previous garage loft has come in handy in loading sheets on to the drywall lift

I would agree with others - green glue is easy to apply but for something that's not really a glue - its extremely sticky when you get it on the floor or tools, hands or anything else :(

Clearing the floor allows me to start the wall that separates the studio from my workshop - you can see I've been fitting the double top plate - fiddling around to get the right rake on the top and horizontal on the bottom to save on raking all the tops of the uprights.
20221128_190023.jpg
I need that wall built to finish this half of the ceiling (and the wall of course ;) )...then its on the to the other side
20221128_190127.jpg
...but I will have to move the rear pile of gyprock before I can get very far :(

Andrew


gearjunk1e
Full Member
Posts: 104
Joined: Sun, 2021-Mar-07, 19:19
Location: Orange Australia

Stand alone "room in a room" studio build in Orange NSW Australia

#15

Postby gearjunk1e » Fri, 2023-Apr-21, 05:26

Fast forward to April 2023 - I’m amazed how fast time goes when you are building!

Aside from rechecking and reinforcing some of the sealant work around the centre beam, my outer ceiling is complete and the outer (dividing) wall between the studio and workshop is now well advanced. I’ve been holding back on completion of that dividing wall pending some final detailed design work and to allow easy access to bring in materials for the inside skin and cabling/AC installation access.

I’ve also now decided to phase the project - prioritising work on the live room (LR) as I’m getting tired of sharing my “music room” in the house with my wife’s crafts and that room doubles as a guest room. Of course, my wife is equally unhappy with the arrangement – she naturally believes she is sharing her craft room with me!

The plan is now to get the live room up and running by end of June with the dividing wall between the studio and workshop complete the whole way across. I will put a temporary fill into the window space between the LR and CR and complete the CR by year end.

Following this I will post some further design updates on doors and the vapour barrier in the design section.

Here’s some pics of progress since my last post.
20221212_170257.JPG
the slab is pretty flat but there is a dip where this wall begins - lots of packing before the application of lots of sealant
20221216_172105.JPG
With the top plate already in place - need some support while I create the frame below!
20230115_121750.JPG
Starting on the outer ceiling above the CR
20230204_194001.JPG
Magically transported to the end of the ceiling work and just before the lift needs to come down to allow the last ceiling panels to go up
20230304_163339.JPG
A big moment - the last ceiling panel - 2nd layer - no more metal screws - yay!
20230316_085203.JPG
Starting on the CR side of the outer wall now the ceiling is hung
20230316_085214.JPG
Outer wall in front of the LR
20230316_085320.JPG
Inside view with the full ceiling hung
20230316_085357.JPG
A seriously useful purchase
20230330_195819.JPG
Testing the frame - just a single one at this stage - using the door as my straight edge
20230405_145327.JPG
Pulling together the double frame
20230405_172437.JPG
First inside wall base plates
20230411_122952.JPG
Frame doubled up and rubber attached in the gap - I routed out a 1.5mm section so the rubber sat flush with the frame then taped with the tape I used on the outer wall vapour barrier - this stuff stays stuck
20230418_175839.JPG
Starting the inside wall frame


  • Similar Topics
    Statistics
    Last post

Who is online

Users browsing this forum: Google [Bot] and 21 guests